Halloween Costumes Throughout The Years…

ems-halloween

It’s not often I share snippets of my family life here on Confetti & Curves… but this year it felt a little different as it’s Emma’s last year in primary school. No more getting up at the screech of dawn to dust off the face paints and fake blood. It’s certainly the end of an era, but as my little girl prepares for High School I thought it would be fun to take a look back at some of her cute, quirky and slightly gory Halloween costumes right back from P1…

.

Primary 1

 p1

Emma’s first year at school and her first Halloween party with all her new best friends… lots of green face paint and scowls as she opted for dressing up as a tiny witch!

.

Primary 2

p2

Her second year of school and once again it was witching hour… only this time I reckon she’d perfected the pose a little better 😉 Practice makes perfect after all!!!

.

Primary 3

p3

For her 3rd year of primary school, Emma based her costume all around her mini hat that she loved wearing… a long black wig and sparkly ball gown was the perfect ensemble for a scary victorian vampire type lady – we’re still trying to put a name to it 😀 Check out her makeup – all done by a tiny but talented Emma!

.

Primary 4

p4

More wigs, layers of cream makeup and a super hot wig with purple highlights transformed this little lady into a rather spooky (if not slightly cute) vampiress!

.

Primary 5

p5

Lots of hair back-combing, oozing fake blood and dark sultry eyes edged with veins was the ingredients required for Dracula’s Daughter. This scary look won her first prize at fancy dress! *woo hoo*

.

Primary 7 – Emma’s last year!

p7-2

Gosh my little girl looks so grown up… all dressed in her victorian maids costume she was eager to have her face painted just like a Victorian dolly – finished off with the little crack in her head to give the illusion of broken porcelain! I wonder if she’ll be up for doing some extra chores around the house seeing as she looks so good in character?! *hehe*

pink heart

One very proud mama – it’s been such an exciting and fun journey creating her primary school costumes over the years and watching her flourish into a confident little lady! Not gonna lie, I’m a little saddened it’s her last Halloween at primary school with all the great memories and friends she’s made but I’m pretty sure it won’t stop her partying just as hard next year at high school!

Wishing you all a fabulous Halloween weekend whatever you’re up to, don’t forget to say a quick hello in the comments below 🙂

Cheerio Chums…

Karen signature

Catch me on:

Twitter   /   Instagram   /   YouTube   /   Facebook

……..

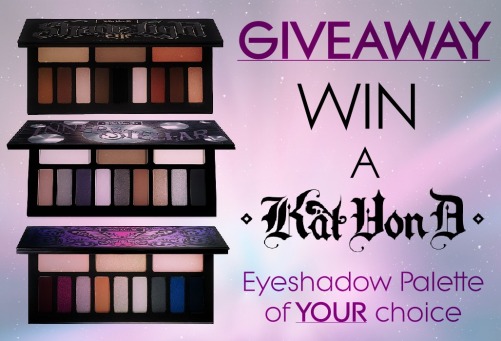
***CLICK HERE TO CHECK OUT THE CONFETTI & CURVES INTERNATIONAL GIVEAWAY***

kat-von-d-eyeshadow-competition

Seven Spooky Nail Art Designs For Halloween…

spooky-halloween-nails

I’m currently obsessed with browsing over intricate little nail designs, which is no surprise coming from a nail tech. Pinterest, Instagram, Google – I could spend hours sifting through the hoards of awe inspiring nail designs. However this Halloween I’ve a few clients who are super excited to get their talons transformed into something rather spooktacular!

To help me conjure up a few concepts of my own I’ve stumbled across some inspirational design ideas that have been hand-crafted by some of the best nail artists on the web. So if like me, you’re on the lookout for some fun ways to jazz up your nails this Hallows Eve then check out this creepy crew…

.

1) Peek-a-boo

google-eyes

Cute, fun and best of all an easy peasy nail art project for virtually any skill level. All you need is some good quality black & white polish, along with a dotting tool, and hey presto – you can create your very own little spooky eyeballs!

.

2) Mummified

mummy-nails

How hilarious is this Egyptian mummy inspired nail art by YaGala?! I love the little googly eyes that give it such a fun 3D quality – definitely one I’ll be trying out over the next few days!

.

3) Sugar Skulls

x354-q80

Over the past few years ‘Sugar Skulls’ have become a hot Halloween trend, with awesome face paints and fun makeup tutorials! I love these colourful skull nail decals which make decorating your talons a whoooole lot easier. Simply wet, peel and stick! What a fab idea 😀

.

4) Haunted House 

hw-nails

Wow!! I adore this cute little Haunted House scene from Stylish_Mom. That gorgeous matte ombre effect finished off with such intricate hand painted designs makes this the perfect eye-catching illustration for any trick or treater!

.

5) Itty Black Kitty

54ff72f31a28c-9-halloween-manicures-lgn

No Halloween nail art collection would be complete without the universal accessory of spookiness – the illustrious black cat. I love the purple background and cute kitty’s face peeking over the free-edge created by The Nail Trail. This is definitely one to etch onto on my to-do list!!

.

6) Wonder Web

spider-web

How fabulous is this chic spiders web design? However, fear not fellow shaky-handed folk as there are plenty of Halloween themed stamping plates to help you achieve the same precise detail without having to be a modern day Picasso!

.

7) Jack Skellington

halloween-nail-art-jack-skellington

Obviously, I had to include a nail design of one of my favourite Halloween characters’ – the fabulous Jack Skellington. I’m head over heels for this work of nail-art by Cute Polish… and it looks pretty easy to recreate. It’s certainly inspired me to give it a go!

pink heart

What’s your favourite spooky nail art design? Will you be giving your nails a frightful makeover? Whatever your thoughts I’d love to read them in the comments below so do stop by for a quick chatter 🙂

Cheerio Chums…

Karen signature

Catch me on:

Twitter   /   Instagram   /   YouTube   /   Facebook

……..

***CLICK HERE TO CHECK OUT THE CONFETTI & CURVES INTERNATIONAL GIVEAWAY***

kat-von-d-eyeshadow-competition


DIY Spooky Halloween Bat Display…

halloween-bat-display

As Halloween swiftly approaches, I always get an overwhelming desire to roll up my sleeves, break out the acrylic paints, paper glue and dive right into making cute little Halloween crafts. Of course having an 11 year old daughter only adds to the excuse to run riot, and as per usual Emma’s roped into peppering our little abode with all sorts of spooky artistry.

This year I thought I’d attempt a really cute bat display I spotted in Tesco Food & Living Magazine. Although the original creation is displayed with the twigs pushed into a Pumpkin, Em’s and I thought we’d save ours the pain of piercing him with garden sticks and opted a glass flower vase instead finished off with black ribbon.

I must admit, this is probably one of the easiest and most effective Halloween crafts I’ve created (even the most novice of crafter can’t go far wrong), it doesn’t make too much mess (though a table covering is highly recommended) and is relatively quick so you’re not left grumbling a few hours later – great for eager kiddies who prefer to see their efforts come to life rather pronto!

So here’s what you’ll need:

HWC1

Firstly, get yourself out to the garden or local woodland and find some decent size twigs. Thankfully our garden is edged with rather bulky bushes so uncovering our twigs wasn’t too much of a task, however, you’ll also need to rustle up:

Some paint (acrylic works really well)

A decent child’s sized paint brush

Some black card

Twine or thread

A pencil and pair of scissors…

Something to display the twigs in when done: vase/pumpkin/large jar/ empty bottle etc.

.

Here’s how to do it:

After rummaging around the garden to find your chosen sticks, clear them of all dirt and debri. I’d suggest you also give them a clean under warm water to remove any hidden nasties that could be lurking. If necessary leave them to dry.

Garden

(We found ours right beside Peppa the cat)

Once dry it’s time to roll up your sleeves and get painting! Em’s and I chose a gorgeous coppery acrylic paint for a touch of autumnal shimmer. However blacks, browns and even purple will look equally as impressive. Just make sure you get all the nooks and crannies covered, then leave the paint to dry – this really shouldn’t take too long if using acrylic, ours were touchable in 30 minutes!

Copper Acrylic Paint

Next take your black card and draw a template of a bat with your pencil. Cut this out and use it to draw another 4-6 bats… or as many as you darn well like! Carefully cut out your little colony of bats and trim to neaten. You’ll also need to rub out any obvious pencil lines.

Bat Outline Bats Cut Out

Next make a hole in the head of your bat *ouch* and carefully tie your thread through. I used a hole punch as my card was rather thick. Now make a loop on the other end of the thread to dangle your bats from the twigs.

HWC5 HWC6

Display your twigs in a vase (or pumpkin) and enjoy your crafty art work… voila!

HWC10 HWC8

.

Top Tips…

  • Sprinkle your twigs with glitter for an extra twinkly effect… black glitter looks fantastic over black acrylic paint!
  • Once done keep them for Christmas. You can always swap your bats for mini baubles!
  • If you’re limited for space why not make a miniature version to display on your desk? Your bats could look super cute in a jam jar with some spooky themed ribbon tied around it!

pink heart

Will you be attempting any Halloween themed crafts this year? Whatever your thoughts I’d love to read them in the comments below so do stop by for a quick chatter 🙂

Cheerio Chums…

Karen signature

Catch me on:

Twitter   /   Instagram   /   YouTube   /   Facebook

……..

***CLICK HERE TO CHECK OUT THE CONFETTI & CURVES INTERNATIONAL GIVEAWAY***

kat-von-d-eyeshadow-competition


Seven Spooky Shadow Designs For Halloween…

seven-spooky-shadow-designs-for-halloween

It’s (almost) that time of year again… pumpkins, kids trick or treating, a ridiculous array of cheesy cackling ornaments lining the shelves of supermarkets. Yes, Halloween is certainly on the countdown radar for us all. However if like me, you’re hoarding a selection of eyeshadows that rarely see the light of day, then now’s the perfect time to roll up your sleeves and get creative as today I’m sharing some of the most interesting eye shadow designs created by a selection of makeup geniuses I found in & around the interwebs. Just to be perfectly clear chums, these are by no means my creations, but simply the outstanding work of fellow makeup addicts. So if you’re in the mood for vamping up your lids on fright night then look no further than these spooktacular concoctions…

.

1) Peek-a-boo

hw3

How cute & quirky is this fantastic kitty design by Tal Peleg? I adore the subtle green base, slender liner and simple illustration… and the teeny little paws finish it off purrrfectly.

.

2) Leopard Lid

hw5

Although I’m quite often found designing animal prints on nail art I’m yet to try it on my lids, thankfully this design is actually pretty simple to recreate so you don’t need to be a Picasso to master the craft. A gorgeous smokey shadow, vibrant inner lid & viola your base is done. I love the whispy lashes too – not too overdressed & lets the artwork speak for itself.

.

3) Nightmare Before Christmas

hw7

Who doesn’t love a dose of Jack Skellington? Even Mr Burton himself would be in awe of this gorgeous shadow art design brought to life by Kiki Makeup. Maybe a little over-ambitious for my skill set but I’d love to give it a go… not quite sure my patience & shaky hand would agree *sigh*

.

4) Harley Quin

hw1

It’s pretty safe to say that this year Halloween parties across the globe will be awash with Harley Quin costumes, however this animated inspired look is super eye catching & works a treat with the vibrant red brows and long playful lashes.

.

5) Cat Woman

hw2

Sticking with the Batman theme, I adore the pop of bold colours so brilliantly used in this fabulous Cat Woman inspired shadow design. That gorgeous blended purple & super sharp cat line is on fleek 😉 not to mention the stunning purple contact lens and feather lashes to create a dramatic look that’s bound to catch a few eyes!

.

6) Star Trail

hw8

It may not be the most colourful but I absolutely adore this fun star-trail design! It’s simply the perfect way to dress up your eyes without needing a masters degree in art & design!!! Better still, you can purchase temporary eye tattoo’s to achieve this look (and many others) without having to spend hours creating a mini galaxy… check out Anteatersink on Etsy for lots of great temporary eye tattoo designs!

.

7) Playful Kitty

hw7

Being a maaaahoosive cat fan I simply had to include this final awe-inspiring kitty design, complete with its own little ball of yarn and string. It’s adorable in every way – maybe not the easiest to recreate, nor the most stay-proof for an all night spook fest, but it’s utter genius none the less! Love it!

pink heart

What’s your favourite spooky shadow design? Will you be dressing up this Halloween? Whatever your thoughts I’d love to read them in the comments below so do stop by for a quick chatter 🙂

Cheerio Chums…

Karen signature

Catch me on:

Twitter   /   Instagram   /   YouTube   /   Facebook

……..

***CLICK HERE TO CHECK OUT THE CONFETTI & CURVES INTERNATIONAL GIVEAWAY***

kat-von-d-eyeshadow-competition

Keeping Up With Karen…

Keeping Up With Karen

Happy November Ya’ll…

Time to pack away the pumpkins as a new month descends upon us! Did y’all have spectactularly spook fun last night? We sure did after visiting the Monster Mash in Belfast for a fantastic fireworks display & lots of yummy Halloween treats! However today I’ll be recharging the batteries and catching up with a bit of blog scheduling, so for those of you who’d like to feast your eye’s on what’s been happening on Confetti & Curves this week, here’s a quick recap…

.

10 Tips on Growing Your Blog Audience

How To Grow Your Blog Audience

Creating a blog is a fantastic way to meet hundreds (if not thousands) of like minded people all over the world. If you’re pouring your heart & soul into creating fun features then make sure you’re not missing out on ways to spread the word by checking out these 10 simple steps that have undoubtedly helped me grow my blog audience… maybe they’ll work just as well for you too!

.

Behind The Blog featuring Life According To Jamie

Life According To Jamie

This weeks first blogger gracing the virtual sofa was the lovely Jamie from Life According To Jamie. This fashionista and cosmetic craver is a regular blogger who adores gracing our screen with fun outfits, lifestyle & a sprinkling of beauty. Don’t forget to check out her favourite inspirational quote… love it!

.

Beautiful Star Electric Hair Straightening Brush

Beautiful Star Electric Hair Straightening Brush

After spotting this intriguing electric hair straightening brush by Beautiful Star, I simply had to check it our for myself! Could it really be as great as the reviews suggest for only £35? So what’s the hype all about? Check out this weeks video to find out…

.

Behind The Blog featuring Closing Winter 

Closing Winter

Our second blogger of the week is the talented Holly from Closing Winter. Holly’s blog is a jolly mixture of home decor, beauty & lifestyle. Grab your cuppa and get comfy as she takes us on a sneak peek behind the scenes of her blossoming corner of the interweb… don’t forget to pop over and say a huge hello too!

.

Trick Or Treat? Happy Halloween from Confetti & Curves

Trick or Treat Halloween 2015a

It’s been a frightfully fun week here at Confetti & Curves HQ, what with Emma winning her school fancy dress contest and a batch of pumpkins to hack to bits skill-fully carve! Why not stop by and check out our fun make-up look & scary vegetables for yourself…

.

As always, thank y’all so very much for the abundance of support, comments, re-tweets, shares, likes & just darn right loveliness. You lot really are an awesome bunch. Do feel free to pop a favourite link from your blog in the comments below for the rest of us to check out, otherwise don’t forget to say a quick hello!

Cheerio Chums…

Karen signature

Catch me on:

Twitter   /   Instagram   /   YouTube

Trick or Treat? Happy Halloween from Confetti & Curves…

Trick or Treat Halloween 2015a

Face paints, toffee apples, fireworks & a whole lotta headache… yes it’s that time of year (once again) where we load our cars with oversized vegetables to spend an evening covered in seeds and stringy gloop in the hope that our fruitful efforts will wield some sort of impressive yet terrifying organic candle holder *rolls eyes*

I’e already had droves of mini skeletons & Dracula’s grace my door with their chanting and tiny treat bags. It seems the older I get the more it all becomes a bit of a kerfuffle & unnecessary hassle, yet deep down my mischievous inner child secretly loves the fancy dress & distinctive aroma of brightly coloured screeching rockets. Of course this all leads to the perks of having a 10 year old daughter as there’s a solid excuse to roll the sleeves up and get caught up in the Halloween fun…and this year was no exception.

As school ended last week for mid term, Emma dived into the car declaring she’d won best dressed at her school party *woo hoo* Clearly my horrendous 5am make-up attempts worked a treat – that’s the great thing about zombie cosmetics, the worse looking the better! Of course this pre-empted me being summonsed to Tesco’s fruit & veg aisle to dig out two heavy weight pumpkins that would kick start the spooky shenanigans. So in honour of what turned out to be an evening of Halloween fun, here’s a little peek at what ghostly goings on have been happening in Confetti & Curves HQ these last few days…

.

Emma  Emma2

Okay, so I’ve cheated with Em’s photograph & used last years piccies (yep, I forget to take those essential proud parent snaps this year *groan*) but in honesty this years costume wasn’t a kick in the rump of last years. All much the same, needless to say it’s still quite a transformation – not bad right? 😉

bat png

Pumpkins Tesco

As for our trip to Tesco’s here’s the two monsters we arrived home with… my poor back trying to lug this pair in and out of the trolley!!

bat png

Pumpkin Carving

And so the carving begins by firstly scooping out the rancid innerds. I must admit, the stench of pumpkin doesn’t make my mouth water. Thankfully these two weren’t (too) bad… indeed my Yankee Candles were saved for another day. However the kitchen table was more like a scene from a vegetarian horror movie.

bat png

DSC01412

The concentration on Emma’s face… her Jack Skellington creation took complete silence and focus. I on the other hand was happily drawing simple little triangles. Can’t beat a bit of tradition.

bat png

illooms light up balloons for Halloween

Being a bit of a worry wart when it comes to naked flames, I spotted this pack of 5 illoom light up balloons on offer (also in Tesco) for a mere £2.50. No need to worry about candles etc, these are so much safer to use and last an impressive 15 hours! Quite the bargain, don’t you think?

bat png

Pumpkin Carving 1

Voila! Our work is complete. Considering I’ve a good 13 years experience on Emma I’m a tad deflated that mine looks a bit ‘meh’ in comparison to Jack Skellingotn… not that I’m competitive or anything *pfft*

bat png

I’ll be Instagraming a pic of these frightful faces lit up with their illoom balloons on Saturday night, so keep your eye’s peeled and do let me know that you think! Now just to prepare for Saturday nights Monster Mash festival & firework display 😉

.

Have you any fun plans for Halloween? Or will you be locking the doors & closing the curtains in hope to avoid as much of it as you can?  Whatever you’re up to stay safe & have fun!

Cheerio Chums…

Karen signature

Catch me on:

Twitter   /   Instagram   /   YouTube

Trick or Treat? Make-Up for Tiny Terrors…

Trick or Treat

Hello lovelies… finally, the spookiest day of the year has arrived and here at the Rees household excitement is running high as pumpkins are carved, toffee apples are ready for consumption and my make-up kit prepares itself to create a series of frightful looks for a night of trick or treating. However, a few days ago I had a little early practice at creating a bewitching look for my daughter Emma’s end of term Halloween disco. Being a nine year old who loves nothing more than playing dress up and painting herself in play make-up, it was no surprise she wanted to go all out this year and opt for a very scary look that would combine a mixture of grease paint, false blood and LOTS of back combing… and so off to Asda we went in search for some inspiration amongst their Halloween aisle! I must say I was rather impressed with their selection of goodies, but after a good rummage round the shelves Em’s and I opted for the Smiffy’s Make-Up FX kit that contained the necessary face-paints, blood capsules, sponge and  brush to make the look a success. At a mere £4 I was more than happy to make the investment, particularly if it saves my own make-up collection from being tortured to within an inch of its life.

The kit itself may seem pretty basic to look at but it done the job perfectly. The face paints went on without any bother whatsoever (compared to some cheaper ones we’ve tried in previous years) and gave a very realistic look, especially when the white is lightly dabbed over with the black to create more of a cadaverous grey/bruised effect. I will say however, that the sponge is incredibly tiny and at times hard to keep hold off so if you have a bigger applicator lying about I’d highly recommend you keep it to hand. The basic face application took about 20 minutes in total which wasn’t too painful, Emma remarked how comfortable it felt and non irritating for her sensitive skin – which is always a major plus as not every product is suitable for her to wear. Thankfully we had applied a little tester 24 hours before the main application, just to ensure it was safe enough to use without flaring up any unwanted reactions.

Emma

To finish the look I dug out an old liquid liner and added a few little stitches on various parts of her face (including the sides of her mouth) and drew some very fine vein lines just under her darkened eyes which added some  fun detail to make it a little more realistic. Finally that left us adding the false blood, which I must admit was so much fun! Considering they come in tiny little capsules I was preparing myself for a rather messy, blood splattered kitchen floor after assuming the contents would literally burst out everywhere. However I was surprised to find it was a lot more thicker than I imagined which made it really easy to create the look we wanted.

Emma2

TA-DA! So there you have it, one tiny terror all ready for a night of ghostly goings-on. If you have any great tips for Halloween or Special effects make-up, have created your own super spooky look or have a recent Halloween blog-post you’d like to share do leave it in the comments below, I’d love to check them out!

Wishing you all a frighteningly fun but super-safe Halloween… Cheerio chums! 🙂

Karen signature

Trick or Treat? Halloween Party Style File…

Halloween Style File

It’s that time of year where most high-street stores are crammed full of pumpkins, pitch forks and pointy witch’s hats. However not all of us are doomed (or willing) to spend a night smeared in grease paint and dripping with false blood. For those glam-loving gals who prefer to step out in style, I’ve compiled a little style-file containing my favourite finds to guarantee you’ll be the fairest of them all at your upcoming Halloween Ball….

Autumn Party Look

 1) ASOS CURVE Body Con Dress with Frill Sleeve: This gorgeous stretch jersey dress is designed with us fuller figured females in mind. Available up to a size 30, no one need miss out on being the belle of the ball… what a show stopper!

2) Daniel Sandler Billion Dollar Body Shimmer: This beautiful glimmering powder adds a lightweight shimmer to highlight and enhance the skin. With its smooth velvety texture it’s perfect for adding warmth to almost any complexion.

3) MaxFactor Colour Collections So Berry Lipstick: What better way to make an impact than by rocking a set of bewitching berry lips? It’s the perfect autumnal tone to add a pop of sumptuous party pout.

4) Bijoux Oui Spider Web Gold Plated Earrings: Come on… even the classiest of Halloween party outfit deserves a little sprinkling of subtle spookiness, don’t you agree?

5) Bobby Brown Warm Eye Shadow Palette: No party outfit is complete without a set of shimmering smoky lids. How gorgeous would these warm & sparkly eye shades look with that beautiful berry lipstick, huh ladies? *swoon*

6) Dazzling Party Clutch Bag: The internet is awash with a selection of charming clutches, it’s just so hard to choose one. However when I stumbled across this bedazzling little beauty for an astonishing £2.29 on EBay I couldn’t resist including it in my top picks.

7) My Natural Lashes by Rimini, Eye Lashes Direct: These luscious lashes will add the perfect finishing touch to create a natural yet full look. Having been worn by the likes of Madonna, Kim K, Heidi Klum, Jennifer Lopez & Michella Obama, you know you’re in great company!

8) Glitter Pointed High Heels: Finally my favourite accessory… the footwear! In my humble opinion there is nothing more captivating than a sensational shoe, and what girl doesn’t love a bit of sparkle? Treat those feet to something special such as these glitter shoes from Thats Point. At mere £21.20 what’s not to love?

So there you have it my little firecrackers, my top picks when it comes to creating a sassy Halloween party outfit – all without a set of false vampire teeth in sight I may add! Don’t forget to share any thoughts or fabulous finds of your own in the comments below, I love reading & responding to them all…

Karen signature

Spooky Halloween Bat Display…

As Halloween swiftly approaches, I always get an overwhelming desire to roll up my sleeves, break out the acrylic paints, paper glue and dive right into making cute little Halloween crafts. Of course having a nine year old daughter only adds to the excuse to run riot, and as per usual Emma’s roped into peppering our little abode with all sorts of spooky artistry.

Halloween Bat Display

This year I thought I’d attempt a really cute bat display I spotted in Tesco Food & Living Magazine. Although the original creation is displayed with the twigs pushed into a Pumpkin, Em’s and I thought we’d save ours the pain of piercing him with garden sticks and opted a glass flower vase instead finished off with black ribbon.

I must admit, this is probably one of the easiest and most effective Halloween crafts I’ve created (even the most novice of crafter can’t go far wrong), it doesn’t make too much mess (though a table covering is highly recommended) and is relatively quick so you’re not left grumbling a few hours later – great for eager kiddies who prefer to see their efforts come to life rather pronto!

So here’s what you’ll need:

HWC1


Firstly, get yourself out to the garden or local woodland and find some decent size twigs. Thankfully our garden is edged with rather bulky bushes so uncovering our twigs wasn’t too much of a task, however you’ll also need to rustle up:


Some paint (acrylic works really well)

A decent child’s sized paint brush

Some black card

Twine or thread

A pencil and pair of scissors…

Something to display the twigs in when done: vase/pumpkin/large jar/ empty bottle etc.


Here’s how to do it:


After rummaging around the garden to find your chosen sticks, clear them of all dirt and debri. I’d suggest you also give them a clean under warm water to remove any hidden nasties that could be lurking. If necessary leave them to dry.

Garden

(We found ours right beside Peppa the cat)

Once dry it’s time to roll up your sleeves and get painting! Em’s and I chose a gorgeous coppery acrylic paint for a touch of autumnal shimmer. However blacks, browns and even purple will look equally as impressive. Just make sure you get all the nooks and crannies covered, then leave the paint to dry – this really shouldn’t take too long if using acrylic, ours were touchable in 30 minutes!

Copper Acrylic Paint

Next take your black card and draw a template of a bat with your pencil. Cut this out and use it to draw another 4-6 bats… or as many as you darn well like! Carefully cut out your little colony of bats and trim to neaten. You’ll also need to rub out any obvious pencil lines.

Bat Outline Bats Cut Out

Next make a hole in the head of your bat *ouch* and carefully tie your thread through. I used a hole punch as my card was rather thick. Now make a loop on the other end of the thread to dangle your bats from the twigs.

HWC5 HWC6

Display your twigs in a vase (or pumpkin) and enjoy your crafty art work… voila!

HWC10 HWC8


Top Tips…


  • Sprinkle your twigs with glitter for an extra twinkly effect… black glitter looks fantastic over black acrylic paint!
  • Once done keep them for Christmas. You can always swap your bats for mini baubles!
  • If you’re limited for space why not make a miniature version to display on your desk? Your bats could look super cute in a jam jar with some spooky themed ribbon tied around it!


Karen signature