As many of know, I’m the kinda girl who loves to roll her sleeves up and get stuck into a crafty little project every once in a while, and seeing as I have an endless list of beauty goodies to review I was pondering over where & how to photograph them – until a little creative light-bulb appeared overhead… why not make my own mini photo studio?
Having an attic crammed full of empty boxes, I was pretty sure one of them could be the perfect candidate for my project… however, not willing to brave the potential army of spiders lurking up the ladder, I managed to convince my hubby into making the trip instead. Yes, he loves me that much! Needless to say he grabbed the perfect box I could transform it into a little photography haven.
Thankfully all went rather well… and seeing as this might come in handy for a few others, I thought I’d share a little tutorial with you guys. It’s mega easy to do and takes no time at all – two things I love in quick craft session!
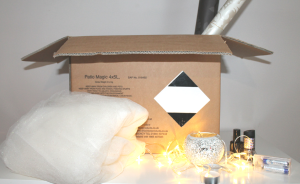
Okay, so you’ll need the following list of magic ingredients….
1) One empty *spider free* cardboard box.
2) Acrylic paint to cover the inside of your box walls with.
3) Wallpaper remnants if you like the idea of a colourful background… check your local DIY store for any freebie off-cuts they have lying around.
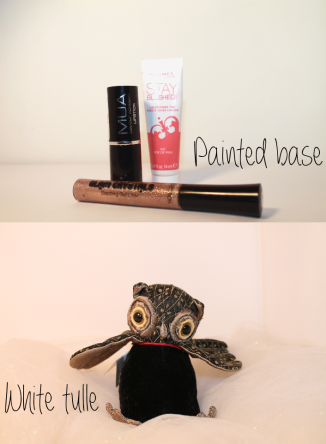
4) Material for your photographed products to perch on, or alternatively you can paint the base!
5) An array of charming little props such as fairy lights, candles, gems or any other cutesy items you want to include.
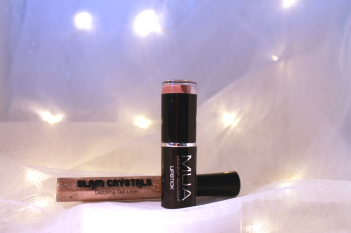
6) Some goodies to photograph.
Here’s how to make the magic happen…
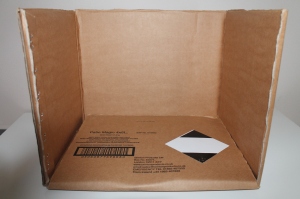
1) Take your empty box and cut out a side wall (including any of the top closure flaps) however if you want to create a slightly more stable base then you can leave the bottom of the side wall attached to the box and fold it in like so:
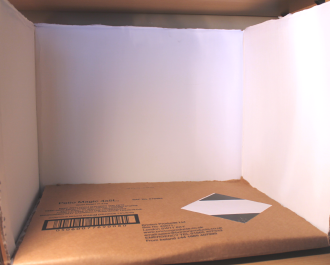
2) Paint the inner walls of your box to create a solid back-drop. I used a white acrylic paint which is water based and easy to work with, it also dries to a nice matte finish very quickly. You’ll probably need to apply 3/4 coats to get a good consistent coverage!
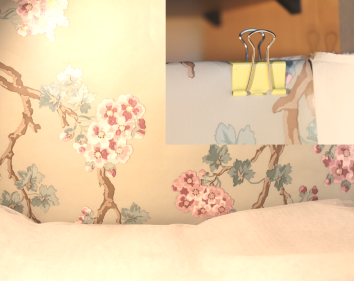
3) You can line the walls of your box with remnants of wallpaper too if you prefer something more colourful… I opted for removing the folded-in flap and clipping the wallpaper on to that instead, so I could change it as often as I liked. Blue-Tack or mini bull-dog clips are great for this! Alternatively, if you have a sheer material you can also use it to create a soft elegant back drop instead!
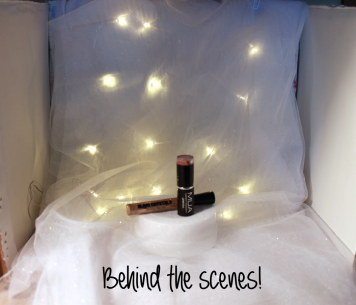
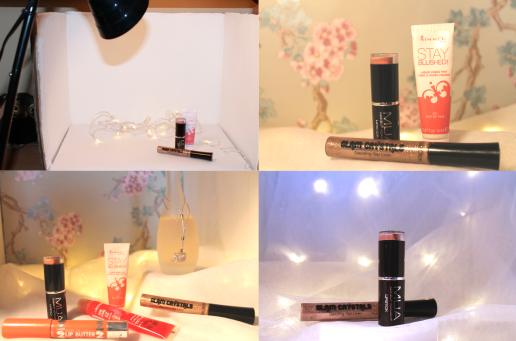
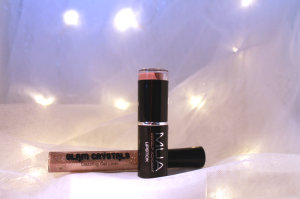
4) If you’re adding some material for the base, pop a few little boxes underneath to give your products some height range. I used white sparkle-tulle that has a light sprinkling of silver sparkle through it to create a beautiful soft look! However you can use other things like a pretty silk scarf to create a nice colourful base setting, alternatively paint the folded side to match your box walls.
5) Once you have your display set up and props in place, its then time to include your goodies. If lighting is an issue, grab yourself a little desk lamp which will help your camera capture a nice bright, clear image!
Once your mini photo shoot is complete just remove everything and keep all your essentials tucked neatly inside the box so you’ll always have everything to hand pretty pronto!
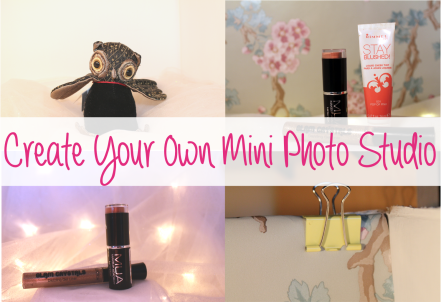
There you have it – your very own little mini photo studio. Naturally you can buy pop up photography tents in a multitude of colours, but if you like something that’s quirky, easy to make and perfect for interchanging background choices then why not give this a go? Not only will it save the pennies, but you’ll always have a handy little place to take quick and easy product shots from. If you do give this crafty little studio a go make sure to send me some pics – I’d love to feature your creation on Confetti & Curves!
What (or where) do you prefer to use for your photography back drop? As always I’d love to read your thoughts & feedback in the comments below!
Thanks for reading… cheerio chums 🙂


Pingback: A Space of My Own | Puddle Side Musings
Thank you so much for this idea! I’ve been struggling with myself trying to think of a cute, easy, inexpensive way to set up a nice photo area. This will be perfect!! I’m now off to craft!
LikeLiked by 2 people
Oooh I am so so happy you find this useful – I still use mine all the time & it’s brill 🙂 Very inexpensive & just as handy hehe Happy crafting ❤ XXX
LikeLiked by 1 person
LOVE this idea! Thank you so much! I’m going to share this with my daughter, as well.
LikeLiked by 1 person
Oooh how lovely Angela – I hope she likes it too, I still use mine all the time! So handy 😀 Thanks so much for your kind comment – made my day XX
LikeLiked by 1 person
Another great post! You’re really helping me improve my blog lol, thank you again x
LikeLiked by 1 person
Awwwh this has made my day – I’m so glad these little posts are helpful for you… I use my little studio every week and it’s never let me down 😀 You are very welcome huni XXXX
LikeLiked by 1 person
haha i will definition be making one soon! such a good idea x
LikeLiked by 1 person
Brill… well hope you enjoy making it as much as I did! Whatever you do stock up on acrylic paint, it’ll take a few layers but sooo worth it lol X
LikeLiked by 1 person
I will make sure i buy lots of it haha thanks x
LikeLiked by 1 person
Pingback: Helpful Resources For Budding Beauty Bloggers… | Confetti and Curves
You may have just saved my life. I posted my 6 things I’ve learnt from blogging yesterday and I mentioned that I am not at all happy with the majority of my photos.. I have really bad lighting and nowhere to photograph anything! You… Beauty!!! Most definitely trying this out! (P.s i most certainly have not been stalking your blog for the last half an hour, just catching up;) hehe! Xox
LikeLiked by 1 person
lol lol Oh Billie your comment has made me giggle soooo much, and has made my day all rolled into one! 😀 I totally get your battle with lighting and room – especially now the darker months of the year will start creeping in it’s just a nightmare *sigh* Hopefully this little photo studio will help you as much as it has me – honestly I’d have been lost without it huni!!! Awwwwwh you can stalk my blog any day – what a compliment!!!! 😀 Hope you’ve had a super weekend *huge hugs* XXXXXX
LikeLike
Seems like I will be marathon-reading on your blog. This post is so interesting and easy to make, will try this for sure! 🙂
LikeLiked by 1 person
lol lol Well enjoy your marathon read huni 😀 It really is such a handy little set up & so cost effective too!! XXX
LikeLiked by 1 person
Pingback: Happy 1st Blogiversary Confetti & Curves… | Confetti and Curves
Pingback: 10 Tips on Growing Your Blog Audience… | Confetti and Curves
Pingback: 10 Photography Backdrop Ideas for Budding Beauty Bloggers… | Confetti and Curves
Love this too! Such a good plan!
https://www.bloglovin.com/blogs/life-without-a-fun-sponge-lwfs-12298541
LikeLiked by 1 person
Thank you Emma, was a really fun little project and super handy too ! Thanks so much for stopping by lovely, looking forward to checking out your blog too 🙂 XXX
LikeLike
I can’t wait to try this out, such a creative and clever idea 🙂 xxx
LikeLiked by 1 person
Awwh thanks lovely 🙂 It really is such a fun project that costs next to nothing to make!!! And surprisingly useful too… I’m still using mine!! lol XXX
LikeLike
I will try send you a photo once I’ve made it 🙂 xx
LikeLiked by 1 person
Awwwh Lucie that would be amazing 🙂 Please do, and thank you huni!!! XXXXX
LikeLike
This is such a clever and very useful idea. Thank you.
LikeLiked by 1 person
You’re so welcome JoHanna 🙂 Thanks for stopping by, glad you like the post!! XXXX
LikeLiked by 1 person
Pingback: 100 Blog Post Idea’s for Beauty Bloggers… | Confetti and Curves
i LOVE THIS IDEa, SUPER affordable and convenient ❤ Thank you so much
Much love, Rahma ❤
http://www.rthijabstyles.wordpress.com
LikeLiked by 1 person
Awwwh thank you!!! It’s certainly been super helpful for me 🙂 Really glad you enjoyed the post huni XXX
LikeLiked by 1 person
Pingback: Things You Need To Do Before Publishing A Blog Post… | Confetti and Curves
Pingback: 100 Blog Post Ideas for Beauty Bloggers… — Confetti and Curves | Rach The Writer